7-in-1 Stainless Steel Nail Kit for Home Manicures
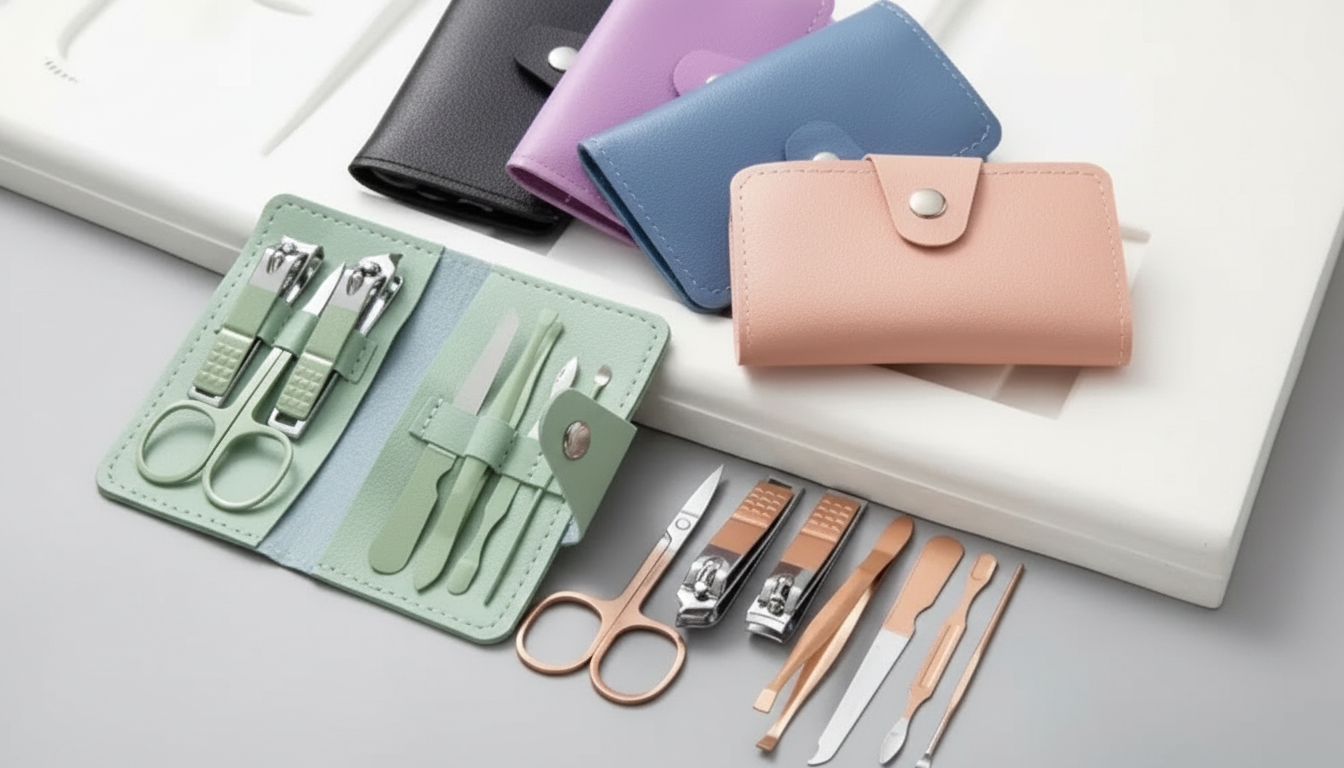
7-in-1 Stainless Steel Manicure & Pedicure Grooming Kit: Clean, Precise Nail Care at Home
A compact stainless steel grooming kit can simplify routine nail care by keeping the most-used tools together, easy to clean, and ready for quick touch-ups. Instead of hunting for a file in a drawer or using clippers that pinch and tear, a coordinated set helps you trim, shape, and tidy with a consistent routine—at home, at work, or on the go.
Below is what a 7-in-1 manicure and pedicure kit typically includes, how to use each tool safely, and how to keep stainless steel tools performing well over time.
What a 7-in-1 stainless steel grooming kit covers
A well-rounded 7-piece kit is designed for the most common hand and foot nail tasks: trimming, shaping, cuticle tidying, and targeted cleanup. Stainless steel tools are popular because they’re durable, simple to wipe down, and better suited to everyday moisture exposure than many lower-grade materials—especially when dried right away after washing. With a single case, tools stay protected, are less likely to get lost, and become much more travel-friendly.
Typical tools in a 7-in-1 manicure & pedicure kit (and what they’re for)
| Tool | Primary use | Best practice |
|---|---|---|
| Nail clipper (standard) | Trim fingernails | Cut after bathing or washing hands when nails are softer; clip small amounts to avoid splitting |
| Nail clipper (slanted/angled) | Detail trimming and corners | Use for controlled corner work; avoid cutting too deep into sidewalls |
| Nail file | Shape and smooth edges | File in one direction to reduce fraying; finish with light strokes |
| Cuticle pusher | Gently push back softened cuticles | Use after soaking; apply minimal pressure to avoid irritation |
| Cuticle trimmer/nipper | Remove loose hangnails or dead cuticle | Trim only non-living tissue; stop if discomfort occurs |
| Ear pick (if included) | Surface-level grooming | Use cautiously; avoid inserting deeply—consider safer alternatives for earwax concerns |
| Tweezers or cleaning tool (if included) | Precise gripping or under-nail cleanup | Use gentle pressure; clean tool tips after each use |
How to use the kit for a quick, clean manicure
1) Prep for control. Wash hands with soap and warm water, then dry fully so tools don’t slip. (If you want to align with everyday hygiene best practices, the CDC’s handwashing guidance is a helpful reference: https://www.cdc.gov/clean-hands/index.html.)
2) Trim with a steady approach. Clip nails straight across using the standard clipper. If your nails are prone to splitting, take off small amounts rather than one big cut. For minor corner refinement, switch to the angled clipper and work slowly.
3) Shape for symmetry. Use the file to smooth edges and refine the shape (square, squoval, or round). A simple habit that helps reduce peeling is filing mostly in one direction with light pressure, then finishing with a few gentle strokes.
4) Soften and tidy cuticles. Soak fingertips briefly in warm water (or wrap with a warm towel for a minute). Gently push back cuticles rather than cutting aggressively. For general nail-care tips that prioritize skin and nail health, see the American Academy of Dermatology’s guidance: https://www.aad.org/public/everyday-care/nail-care-secrets.
5) Detail only what truly needs removing. Use a nipper or trimmer for hangnails or clearly dead skin—never pull, which can tear living tissue and trigger irritation.
6) Finish with moisture. Rinse if needed, dry well, then apply a moisturizer or cuticle oil. This helps reduce dryness and cracking around the nail folds, especially after washing tools and hands.
How to use the kit for a safe at-home pedicure
Start by softening. A warm water soak reduces the force needed for trimming and filing, which helps you avoid taking too much off at once.
Trim toenails conservatively. Keep the cut fairly straight across. Over-rounding corners or cutting too short can increase the chance of painful nail edges later.
Smooth, don’t thin. Use the file to remove sharp corners and snag-prone edges, but avoid over-filing the nail plate. Toenails benefit from strength and thickness, not extreme thinning.
Clean carefully under the free edge. If your kit includes a cleaning tip, use it gently and only where the nail is already lifted from the nail bed. Avoid digging, which can irritate the skin and increase sensitivity.
Moisturize strategically. Focus on heels and the cuticle area, then allow product to absorb before socks or shoes. This helps reduce slipping and gives creams time to work.
Hygiene and cleaning for stainless steel tools
After each use: Wipe tools to remove debris, then wash with soap and warm water. Dry immediately—especially around hinges and joints—so edges stay crisp and moving parts don’t feel sticky over time.
Who this kit suits best
Product pick: 7-in-1 Stainless Steel Manicure & Pedicure Grooming Kit
At-a-glance details
| Item | Details |
|---|---|
| Product | 7-in-1 Stainless Steel Manicure & Pedicure Grooming Kit |
| Price | 6.51 USD |
| Availability | In stock |
| Link | View product |
More in-stock finds
- Interactive Rubber Basketball Dog Toy (in stock)
- Luxury Spring & Summer Dog Dress for Small Breeds (in stock)
Common mistakes to avoid for healthier-looking nails
FAQ
How often should manicure and pedicure tools be cleaned?
Clean tools after every use by washing with soap and warm water, then drying immediately. Disinfect personal tools regularly, especially if there was any skin nick or visible debris.
Is stainless steel good for manicure and pedicure tools?
Yes—stainless steel is commonly used because it’s durable, easier to clean, and holds up better to regular contact with water when dried properly. It’s a practical choice for at-home tools that need frequent wipe-downs.
Should cuticles be cut or pushed back?
Generally, gentle pushing after softening is preferred, and trimming should be limited to loose, non-living skin. Cutting too much can irritate the skin around the nail and make the area feel sore.









Leave a comment